How to Mend and Alter Your Own Clothes
Taking care of your own clothes saves money, cuts down on waste and keeps favourites in rotation for longer. Mending and altering can sound daunting, but you don’t need fancy skills or a sewing machine to get started.
Most repairs and changes can be done with a needle, thread and a bit of patience. Here’s a step-by-step guide to help you look after your clothes and get more wear out of everything you own.
Only buy used clothing from charity shops that don’t test on animals. Also read our post on removing stains, naturally.
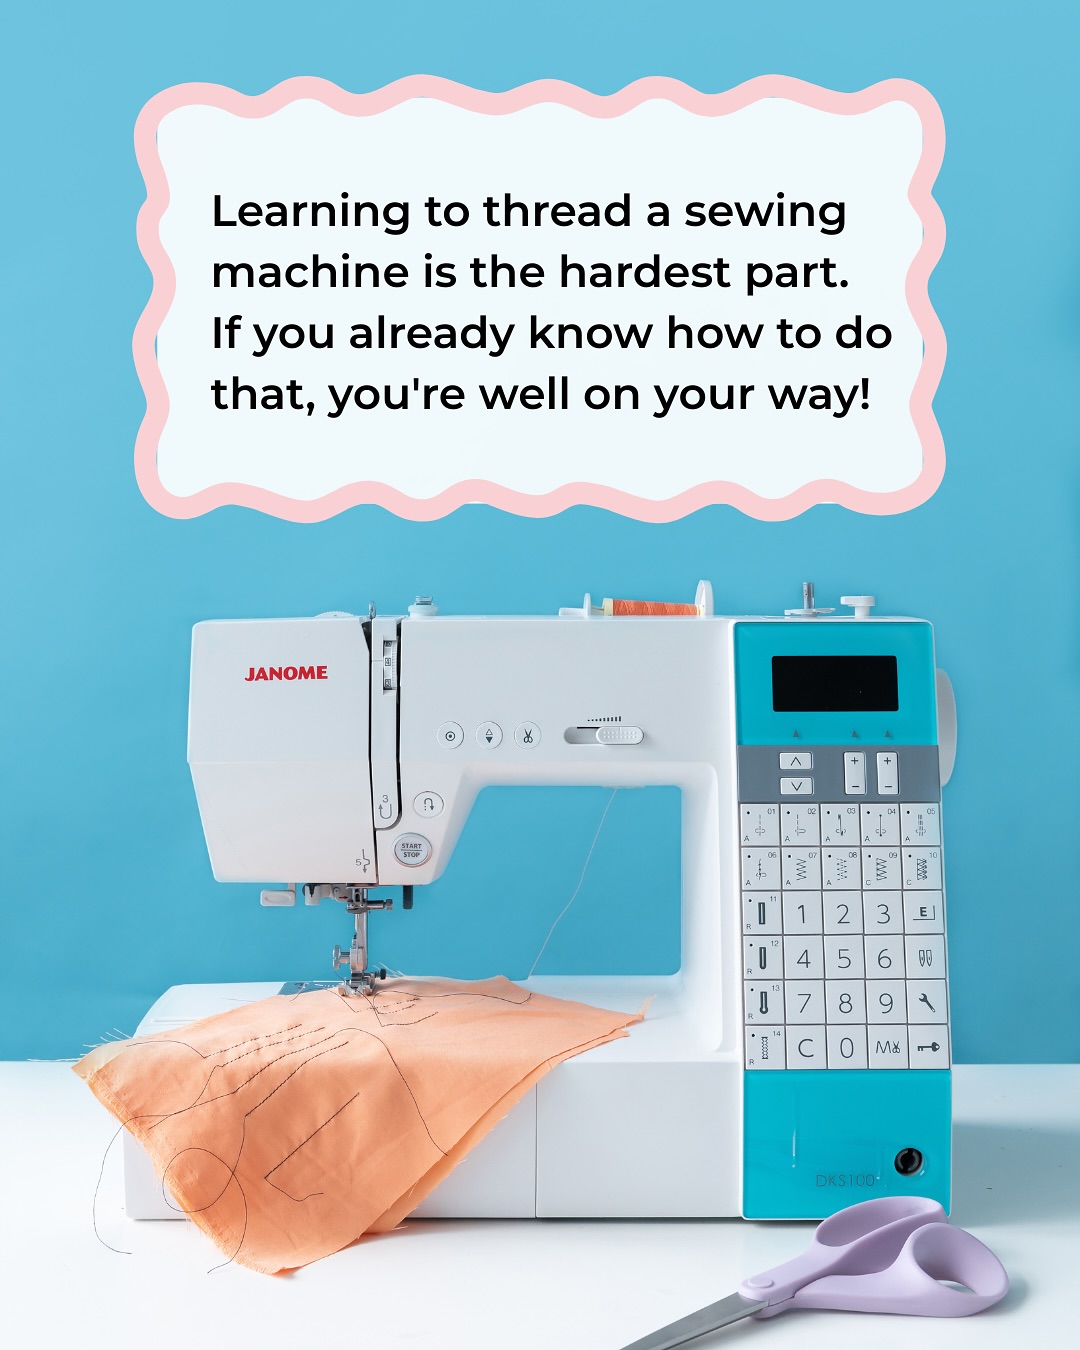
Gather Basic Sewing Tools
Every home wardrobe fix starts with the right tools. At minimum, you’ll need needles, thread in different colours, scissors, pins, a tape measure, and a seam ripper.
A small sewing kit covers most repairs, but you can add extras like a thimble or tailor’s chalk as you go. Sturdy tools make your work faster and easier, so choose ones that feel comfortable in your hands.
Use organic cotton sewing thread and organic cotton fabric. If sewing with upcycled polyester, launder in a microfibre filter. Keep sewing materials away from children and pets.
Repair What You Wear has free online guides to help mend tears, replace zippers, darn holes in socks, patch elbows on jumpers and sew on missing buttons.
Steamery Sewing Kit is sold in a roll case and contains scissors, a seam ripper, fabric pen and threads, sewing pins and needles, safety pins, a metal thimble, measuring tape, quick patches, buttons and a needle threader.
Fixing Loose Buttons
A loose button is one of the simplest repairs to tackle. Keep spare buttons that come with new clothes, and use a needle and matching thread to reattach any that look like they’ll fall off.
Thread your needle, knot the end and sew through the holes several times, making sure the button sits tight but has a little wiggle room for fastening. Finish with a knot on the inside, then snip off any extra thread. With a few minutes’ work, your shirt or coat goes right back into service.
Keep loose buttons away from children and pets.
Repairing Small Holes and Tears
Small holes in jumpers, tees or socks don’t need to mean the end. For knits, use a darning needle and matching yarn to weave across the gap, pulling the edges together. In woven fabrics, turn the item inside out, pinch the hole closed and stitch along the edge with a whipstitch or backstitch.
The key is to use short, close stitches, pulling gently so you don’t gather the fabric. This method works best if you catch holes before they spread.
Adjusting Trouser Hems
If trousers are too long and drag on the ground, they’ll wear out quickly. To shorten them, fold the hem up inside to the right length, pin in place and try them on to check. Then press with an iron, remove the pins and sew a straight line with a needle and matching thread, about half a centimetre from the new edge.
Double-stitch at the sides for strength. For a temporary fix, fabric tape or iron-on adhesive strips work well, though sewing lasts longer.
Taking in or Letting Out Seams
If a shirt or dress feels a bit too baggy, you can take it in to improve the fit. Turn the garment inside out, put it on and pin along the seams where you want it smaller. Mark the new seam with chalk or fabric marker, then sew along this line.
For letting out clothes, unpick the old seam carefully with a seam ripper and see how much extra fabric is available. The extra room can make something comfortable again, especially around the waist or hips.
Patching Knees and Elbows
Knees and elbows see a lot of wear, especially on kids’ clothes or work shirts. Use fabric patches, which you can buy or cut from old clothes, to cover up worn areas. For jeans or heavier materials, iron-on patches are quick and strong.
For lighter fabrics, sew the patch over the hole with a zigzag stitch by hand, making sure to catch all the edges so the patch doesn’t curl up. Choose a patch in a matching colour for a subtle look, or go bold with a contrast.
Replacing Broken Zips
A broken zip can make a jacket or jeans unwearable. Buy a replacement zip of the same length and colour. Remove the old one by carefully unpicking the seam. Pin the new zip in place, checking it sits straight, then hand-sew or use a sewing machine to attach one side at a time.
Take care to keep your stitches close to the zip teeth but don’t sew over them. Strong thread works best to hold it all together.
Tightening Loose Waistbands
Jeans, skirts or trousers with loose waistbands can often be saved. For elastic waistbands, check if the elastic is stretched out or just loose in the casing.
If stretched, replace with new elastic by cutting a small hole inside the waistband, threading in new elastic with a safety pin, then sewing the ends together and closing the gap. For fixed waistbands, you might need to sew a dart (a small tucked fold) at the back to pull in extra fabric.
Shortening Sleeves
Jumper or shirt sleeves that are too long can be a nuisance. To shorten, put on the item and fold the sleeves to the right length, then pin. Remove and use a ruler to check the hem is even, then cut off the extra fabric, leaving a centimetre or so.
Fold the raw edge under, pin and sew with small, even stitches. For jackets or anything lined, you might want to take it to a professional, but most casual tops are easy to alter at home.
Rescuing Stretched Necklines
Tops with stretched necklines don’t sit right and might slip off the shoulder. To tighten, thread a thin elastic through the inside of the neckband, using a safety pin to pull it around. Secure the elastic with a few stitches at the end.
This trick works well on T-shirts, jumpers and dresses and helps keep the shape for many more wears.
Refreshing Popped Seams
Seams can split open from wear or strain, but you can fix them with a few minutes and some thread. Press the seam flat, turn the garment inside out and sew just beside the original stitching, overlapping slightly at each end for strength.
Use a strong thread in a matching colour. Backstitch gives the best hold, especially on side seams or underarms.
How to Care For Your Clothes, Naturally
The Art of Clothing Care is a book of tips to make clothes last. Check a garment’s quality, avoid over-washing, make simple clothing repairs, remove stains, prevent mothballs and shop for pre-loved clothing. For synthetic fibres (including recycled plastic bottles), launder in a microfibre filter.
Wash Less Often
Washing too often wears out fibres fast. Most clothes, unless stained or sweaty, can go a few wears before washing. Airing them out on a hanger does wonders for freshness.
Jeans, jumpers, and jackets love a bit of breathing space rather than a spin in the machine after every use.
Choose Mild Detergents
Strong detergents and synthetic fragrances can break down fabrics and irritate skin. Instead, pick natural laundry powders (unscented for pregnancy/nursing, baby and pet bedding).
These options are kinder to clothes, your skin, and water systems alike.
Wash in Cold Water (not for weak immunity)
Hot water puts stress on fibres and uses more energy. Cold water is gentler and prevents colours from fading. Modern detergents clean just as well in cold cycles, and you’ll save power with every load. Whites and delicates especially benefit from a cooler wash.
Laundry should still be at 60 degrees for babies, pets and people with weak immune systems (including for pregnancy/nursing).
Treat Stains Naturally
Skip the harsh bleach. For most stains, apply a paste of baking soda and water. For stubborn marks, oxygen bleach works a treat. Always test on a seam before treating more visible spots. Read more on removing stains naturally.
Ditch Fabric Softener for Vinegar
Fabric softener can coat clothes with residue, weakening fibres over time. White vinegar softens fabric, removes smells, and doesn’t leave build-up. Add half a cup to the rinse cycle. Your clothes will feel soft and smell fresh, with no hint of vinegar once dry.
Air Dry When You Can
Tumble dryers use a lot of energy and make fibres brittle over time. Hanging clothes outside lets sunlight naturally kill germs and freshen fabrics. Retractable washing lines are safer than rotary lines (store well away when not in use, to avoid tangling for children, pets or wildlife).
Indoors, a drying rack works well and saves space. Even flat-laying knits on a towel will help keep them in shape and avoid stretching.
Store Clothes Properly
How you store your clothes can mean the difference between crisp and crumpled. Use wooden or padded hangers for shirts and jackets. Fold heavy jumpers and keep them on shelves to avoid stretching.
Make sure drawers and wardrobes are dry, and add cotton bags of lavender or cedar to keep out moths without chemicals. Keep lavender and cedar moth prevention balls away from pets.
Mend and Repair Small Issues Early
Loose threads, missing buttons, or tiny holes can be fixed easily with a little effort. A basic sewing kit lets you patch up damage before it becomes worse.
Hand-mending with natural threads keeps your clothes wearable and cuts waste. If you’re interested, there are simple tutorials online that make repairs almost fun.
For big stains and tears, you can ask a tailor to do small repairs. Or book online and send to online tailors like Make Nu.
Refresh Clothes Between Wears
Instead of rewashing, freshen clothes by hanging them in a steamy bathroom. It’s a quick way to get rid of musty smells and help fabrics feel new.
Be Gentle When Ironing
Too much heat or pressure can scorch and flatten fibres. Use a lower heat setting and a clean cotton pressing cloth to protect delicate fabrics.
Let clothes hang up straight after ironing to cool, which helps keep lines and creases crisp without re-pressing.
How to Prevent Mothballs, Naturally
Only two moth species eat animal fibres (wool, feather and fur). So the easy way to prevent them are to wear cotton, hemp and linen. To reduce risk for other fabrics, deep-clean clothes, then store in vacuum bags.
A bit of simple living wouldn’t go amiss (rather than buy too many clothes to ‘store away for winter’). If using red cedar balls to prevent moth balls, keep away from pets and children.
ReBorn (recycled plastic clothes hangers)
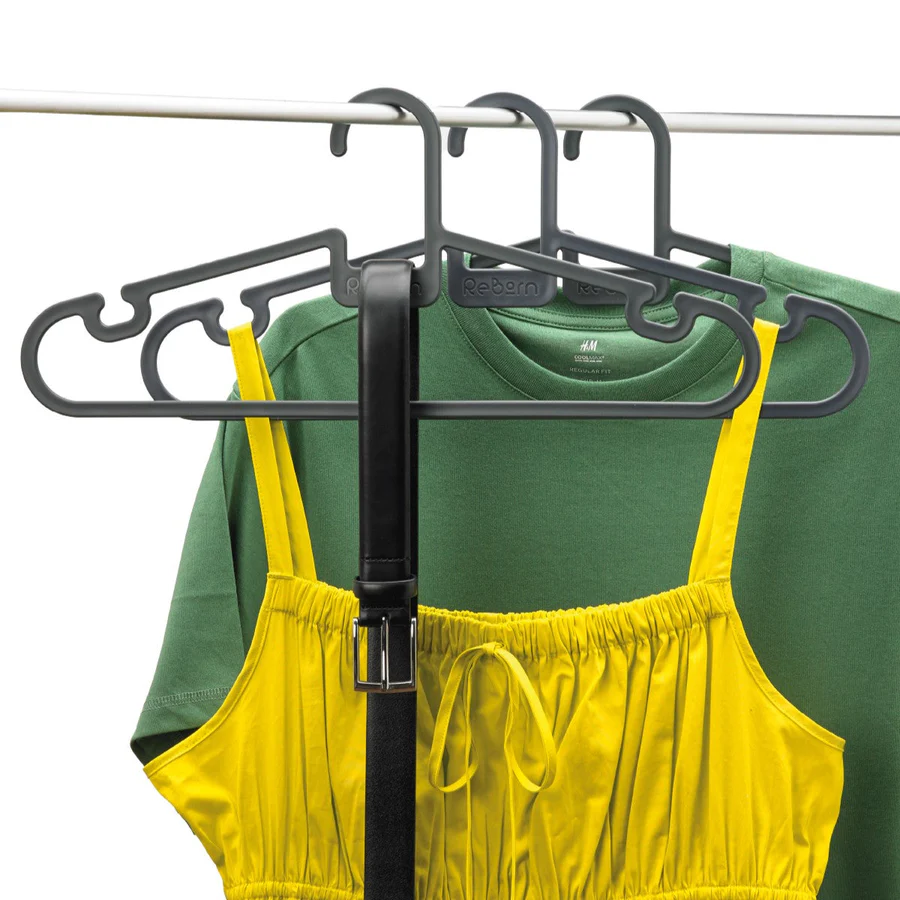
ReBorn recycled coat hangers (Wiltshire) have side notches for thin straps, middle notches for ties/belts, and reinforced bars for heavy trousers. Recycled plastic is not really good for clothing (as it still releases microplastics when laundered, so using them up in items like this is better.
You can recycle metal clothes hangers, and donate other ones to charity shops. Refuse hangers in shops if not needed, as 15 billion are produced in the world each year, with most thrown out after 3 months (8 billion go to landfill).
Environmental Issues with Clothes Hangers
As most are made with cheap plastic or flimsy metal, you can just imagine the landfill issues. Clothes hangers are everywhere – in our wardrobes, in hotel wardrobes, and most shops sell them along with clothes (eco brands tend to use cardboard hangers, especially with children’s clothing).
Around 85% of all clothes hangers end up in landfill. And they are one of the biggest waste problems for shops. Despite plastic bags being given all the attention, it’s likely there is the same scale issue with what one fashion designer calls ‘the fashion industry’s plastic straw’.
In the US, Re hangers are now replacing disposable plastic ones, again these are made from recycled materials. The company also sells slightly damaged hangers at reduced price, to avoid waste.
Fold Your Clothes?
A few years back, Marie Kondo’s book about minimalist homes was all the rage. You can visit her site to learn how to fold your clothes. Then in most cases, you won’t have need for clothes hangers!
A Stylish Reusable Garment Bag
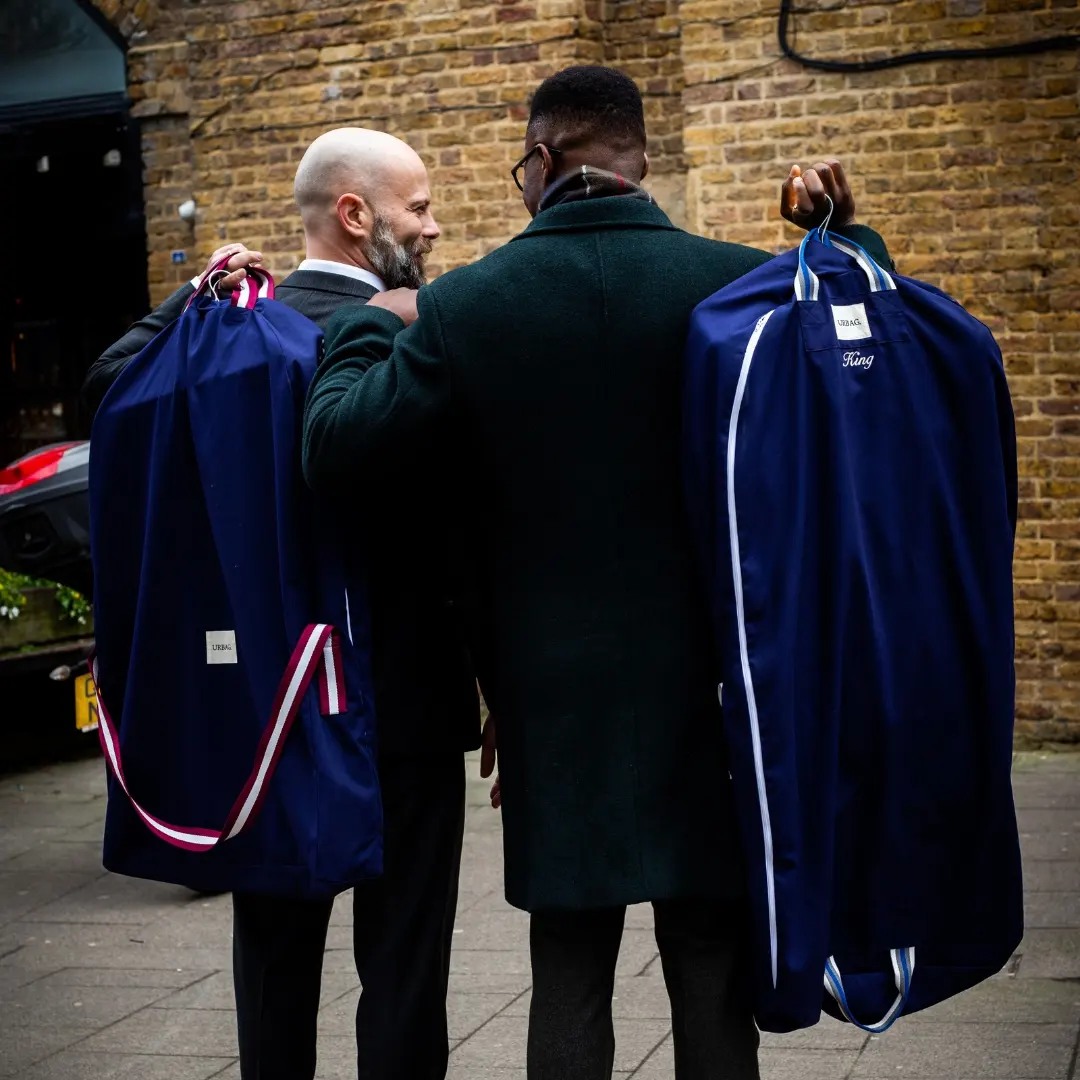
This stylish reusable garment bag is made from a blend of organic cotton and recycled plastic bottles. It’s a zero waste alternative to disposable plastic bags given out in dry cleaning stores.
You can also use it to store out-of-season clothes. One purchase should last years. Despite being lightweight, the cover is dust-proof, weather-proof and resistant to wrinkles and insects, but also lets your clothes breathe.
Although the cover says it’s washable, it contains synthetic fibres. So if you do, launder in a microfibre filter. Sent in zero waste packaging.
Use Eco-Friendly ‘Dry Cleaners
If you buy or wear clothes with dry-cleaning labels, look for local ‘steam cleaners’ instead, as perc chemicals for dry-cleaning are toxic to you, the planet and the people who use them at work.
Companies like London’s Blanc use ‘wet cleaning’ a blend of steam and nontoxic cleaners to give the same results. It’s better also for allergies and (unlike dry-cleaning) can remove organic stains (like the smell of sweat!) It also does not leave a ‘shine’ on suits.